Friday, January 30, 2015

Change Display order of system views

In CRM system views are order by number and alphabets. When view name is starting with number, that view was shown first and then views shown by alphabet orders. 


If want some custom order then we need to modify view name and either add number or alphabets in front of view name 

1.       Go to customization of entity views.

2.       Open view and click on view properties. 
1.       Add either number or alphabet in Front of view name


1.       Save view and change name of other views as per order


1.       Publish customization


with Alphabet order 


Thursday, January 29, 2015

Insert Hyperlink in Email, Email Template or Articles

Most of the time we struggle when wants to add hyperlink in emails which want to send from CRM system.

When composing email wants to add Hyperlink, so that recipient will just click on it and link will be opened..

To do this.. very simple step need to do..

select text where you want add hyperlink and keying CTRL+K


Add your click in URL. Then it looks like 


Same think is working for Email template, Articles. 
Sometime might not work in Chrome or in any other browser.. but mostly works in IE. 


Long label trimming on Form


To show full label on form there are two option.. Supported way.. and unsupported way.. 

Supported option:
You can show complete label on CRM form by using HTML web resource. You need to create HTML web resource and add that web resource as label for attribute. 
And in the HTML web resource add complete label. 
For your attribute whose label is too big.. don't show label on the form by changing field property.


Add Two column section on form and add this field into section. 
Add new HTML web resource to form in above section and set web resources properties as 


Add your label text inside html web resource.. save and publish your form. 
then label will be shown as 


Unsupported option:
Go to CRM server where your CRM web application installed. 
CRMWeb\_common\styles\fonts.css.aspx
Open above file in text editor
 Add CSS element into this file.
  1. .ms-crm-InlineEditLabel { white-space: normal !important; }
Save file.. Do iis reset and check your CRM form. 


There are advantages and disadvantages of both options.. 
If you are doing by supported way then for each long label attribute you need to create and add new html web resource on form. but if you are doing by unsupported way you don't need to create html web resource. 
Main problem with unsupported is that when you install any roll ups you need to make these change in file..  

Tuesday, January 27, 2015

MS CRM Chart - Axis labels sorting by month


In above chart, all month are not shown in correct order.
To correct the order / sort those labels, we need to export chart XML.
In Chart XML, need to look for FetchCollection
<fetchcollection>
  <fetch mapping="logical" aggregate="true">
    <entity name="new_test">
      <attribute groupby="true" alias="_CRMAutoGen_groupby_column_Num_0" dategrouping="month" name="new_date" />
      <attribute alias="_CRMAutoGen_aggregate_column_Num_0" name="new_phone" aggregate="count" />
    </entity>
  </fetch>
</fetchcollection>

Update this fetchXML with 


<fetchcollection>
  <fetch mapping="logical" aggregate="true">
    <entity name="new_test">
      <attribute groupby="true" alias="_CRMAutoGen_groupby_column_Num_0" dategrouping="month" name="new_date" />
      <attribute alias="_CRMAutoGen_aggregate_column_Num_0" name="new_phone" aggregate="count" />
      <order alias="_CRMAutoGen_groupby_column_Num_0" descending="false"/>
    </entity>
  </fetch>
</fetchcollection>

Notice that I used alias of my Date attribute for order. 

Save your XML and reimport to CRM, publish and done..
Now your chart will be look like 


Either one is required on form..

Sometimes we need either phone or email is required to be filled. 
To do this mostly we will write JavaScript, but we can do this by using CRM business rules also.. 

You need do this by adding three different business rules on Phone and Email attribute. 
Here are these business rules
1. When user opens form, on form either you can show message that Phone or Email required and set Business requirement level. 


2.  If email entered, then remove Business requirement from Phone.

3. When Phone entered email is not required. 

Done, save your business rule.. publish.. 


Resolve Circular Reference in CRM data import

Generally when importing data into CRM.. most of the time we will struggle when there is a circular reference between entities.

Suppose if we want to import Account (Company) and contact information into CRM. and want to update company's primary contact which is in contact and Contact's company information which is in Account.

In this case easiest way to import and update circular reference is import both entities data together as zip.

Compress contact.csv and account.csv file into one .zip file, and then using CRM Data Import import zip file.
CRM is supporting for .zip, xml, text and csv file.

Once you uploaded zip file in import wizard, you can select individual file and create mapping for
each file


Map your fields properly and import.. 

You can load only 8 MB of file (xml, csv, text) or 32 mb of zip file for data import. 


Thursday, January 22, 2015

Disable HTML web resource control from CRM Form events

Call below function on CRM form event to access HTML web resource control by tag or Id


function DisableHTMLWebresouceControl()
{
//Get HTML web resource control
 var webRefCtrl = Xrm.Page.getControl('Your web resource ID from form').getObject();

 //web resource HTML document
 var htmlDoc=webRefCtrl.contentDocument;

 //get list of controls by tag name
 var ctrlList = htmlDoc.getElementsByTagName('select');

 //get list of controls by Id
 var ctrlById= doc.getElementById('textCtrl');

 //If web resource is not loaded yet, then call same function after some time.
  if(ctrlList[0]==null)
  {
     setTimeout(DisableHTMLWebresouceControl,1000)
     return;
  }
 
 // disable control in HTML web resource.
 ctrlList[0].disabled =true;
}


Wednesday, January 21, 2015

View Sorting more than two columns

In CRM when creating view, CRM UI is allowing to sort view by only two columns.


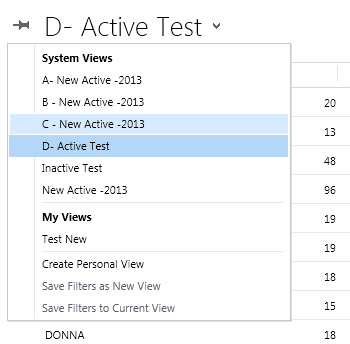
User can sort views by multiple columns when it views opens and by using [SHIFT + click] on multiple columns.


 When we want to sort view by multiple columns when it opens, then need to export customization and need to made changes in customization xml.

Step 1:  Export customization of entity whose view want to sort by more than two columns.
Step 2: Extract and open customization.xml file in Visual studio or XML editor.
Step 3: In the Customization.xml look for Savedquery section for your entity.
Step 4: Find Savedquery of view which you want to sort by more than two columns.
  Saved Query has LocalizedName tag which gives view name.  
Step 5: To sort by more column we need to modify fetchxml of saved query.
General saved query fetch xml will be like

<fetchxml>
              <fetch version="1.0" mapping="logical">
                <entity name="edm_test">
                  <attribute name="edm_name" />
                  <attribute name="createdon" />
                  <order attribute="edm_name" descending="false" />
                  <order attribute="new_age" descending="false" />
                  <filter type="and">
                    <condition attribute="statecode" operator="eq" value="0" />
                  </filter>
                  <attribute name="new_phone" />
                  <attribute name="new_email" />
                  <attribute name="new_date" />
                  <attribute name="new_age" />
                  <attribute name="edm_testid" />
                </entity>
              </fetch>
         </fetchxml>

To sort by more columns add order tag as


Final fetchxml will be
<fetchxml>
              <fetch version="1.0" mapping="logical">
                <entity name="edm_test">
                  <attribute name="edm_name" />
                  <attribute name="createdon" />
                  <order attribute="edm_name" descending="false" />
                  <order attribute="new_age" descending="false" />
    <order attribute="new_phone" descending="false" />
                  <filter type="and">
                    <condition attribute="statecode" operator="eq" value="0" />
                  </filter>
                  <attribute name="new_phone" />
                  <attribute name="new_email" />
                  <attribute name="new_date" />
                  <attribute name="new_age" />
                  <attribute name="edm_testid" />
                </entity>
              </fetch>
         </fetchxml>

Step 6: Save customization.xml file, import and publish.